
RollRestore Editorial Team · Reviewed September 2026
Groin Strain Recovery: The Copenhagen Adductor Protocol at Home
A groin strain is not a “wait it out” injury. Adductor longus tears carry one of the highest recurrence rates in sport up to 18% re-injure in the first year and the reason is almost always the same: athletes return when the pain fades, not when the muscle re-earns the load. The evidence is now unambiguous. Criterion-based rehabilitation built around the Copenhagen adduction exercise cuts re-injury risk and restores eccentric strength deficits that pain-free walking alone cannot fix. This guide translates the Aspetar protocol and the 2025 consensus on return-to-play into an 8-week home plan with the five tools required to run it.

Key Findings
The best-supported home protocol is a four-phase active rehabilitation program anchored on the Copenhagen adduction exercise. In a prospective cohort of 62 male athletes, this criterion-based approach returned 84% of players to full sport in a median of 9.5 weeks with a re-injury rate under 4% at 12 months (Serner et al., 2020). The single non-negotiable metric: hip adduction strength within 10% of the uninvolved side before returning to sprint or cutting. Top pick for the essential loading tool is the TheraBand Resistance Loop Set; the isometric-adductor-squeeze phase 1 tool is the ProBody Pilates 9-inch Ball.
In This Guide
Why Groin Strains Re-Tear
The adductor longus is the workhorse of the groin it decelerates the hip during change of direction, controls the swing leg in sprinting, and stabilizes the pelvis during single-leg loading. When it tears, the pain-driven timeline athletes intuitively follow rest until symptoms fade, then return misses the fact that adductor strains cause profound and lasting eccentric strength deficits that outlast the pain by weeks. A 2020 prospective cohort in the American Journal of Sports Medicine found that even athletes cleared clinically for return to sport had adduction strength deficits averaging 10–15% versus the uninvolved side unless a criterion-based rehabilitation program was followed (Serner et al., 2020).
The 2025 consensus study on return-to-play criteria after adductor longus injury, published in Sports Health and indexed on PubMed (PMID 40423270), validated 14 out of 20 candidate RTP criteria via a panel of 63 injury-management professionals with a mean of 12 years’ experience. Adductor strength symmetry, pain-free single-leg squat, and pain-free sport-specific testing under simulated match conditions were among the validated criteria. Elapsed time was not.
The Copenhagen adduction exercise (CAE) has emerged as the single most-studied loading tool for adductor rehabilitation. A 2026 systematic review in Apunts Sports Medicine pooled ten randomized controlled trials with 1,099 participants and concluded the CAE consistently improves eccentric hip adduction strength, hip range of motion, and dynamic balance, and reduces groin-related symptoms in athletes with existing adductor pain. A 2024 RCT in soccer players (Sabbir et al., PMID 38376593) demonstrated superior eccentric strength gains in the CAE group versus standard care over a 6-week intervention.
Grading Your Strain
Adductor strains are graded on the British Athletics Muscle Injury Classification (BAMIC) or the traditional Grade I–III system. The distinction matters because Grade IIIb tears at the tendon-bone junction and complete ruptures require imaging and, occasionally, surgical consultation. According to Cleveland Clinic and AAOS OrthoInfo, the following features distinguish severity:
- Grade I (mild): Sharp pain during a specific movement, but full walking and mild jogging remain possible. No visible bruising. Typical return: 2–3 weeks.
- Grade II (moderate): Palpable tenderness, painful resisted adduction, some limp, possible mild bruising. Return: 4–8 weeks.
- Grade III (severe): Sudden sharp pain, an audible pop, immediate loss of function, significant bruising within 24–48 hours. Requires imaging (MRI or ultrasound). Return: 8–12+ weeks; occasionally surgical.
Any groin pain accompanied by inability to bear weight, groin-to-scrotum radiation with lump, or fever should be evaluated by a physician immediately to rule out hernia, avulsion fracture, or infection.
The 4-Phase Copenhagen Protocol
The Aspetar acute adductor injury protocol structures rehabilitation into four progressive phases, each gated by a specific pain-free load test rather than a calendar date. This is the framework professional soccer clubs use, and it is directly applicable at home with the right tools.
Phase 1 — Isometric Loading (Days 1–7)
Begin with pain-free isometric adductor squeezes using a small ball or rolled towel between the knees, 5 sets of 10-second holds, three times daily. The goal is to reintroduce load without provoking symptoms. Add short-lever side-lying hip adduction with no weight, keeping the knee bent to reduce moment arm. Progression criterion: Isometric squeeze at 90° hip flexion is pain-free at maximum voluntary contraction.
Phase 2 — Concentric Strengthening (Weeks 2–3)
Introduce dynamic concentric hip adduction with a resistance loop. Side-lying leg raises for adduction, standing cable-style adduction with a band anchored at ankle height, and supported single-leg squats. Volume: 2 sets of 15 reps per side, progressing to 3 sets. Add gentle straight-line jogging once you can complete a 30-second single-leg calf raise pain-free. Progression criterion: Ability to complete 15 repetitions of hip adduction against moderate band resistance without pain or eccentric-phase discomfort.
Phase 3 — Eccentric & Copenhagen (Weeks 3–6)
This is the load-critical phase. Introduce the modified Copenhagen adduction exercise: side-lying with the top leg supported on a low bench or partner’s thigh, lifting the pelvis off the floor and slowly lowering under control (4-second eccentric). Start at short-lever (support at knee) and progress to long-lever (support at ankle) as tolerated. Add slider hip adductions — supine, sliding the leg out and controlling the return. Volume: begin at 2 sets of 6 reps and progress to 4 sets of 12–15 reps over 3–4 weeks. Layer in change-of-direction drills at 50% intensity by end of phase. Progression criterion: Long-lever Copenhagen at 3 sets of 12 reps pain-free.
Phase 4 — Return to Sport (Weeks 6–8+)
Sport-specific progression: multi-directional running, cutting, sprinting, and simulated match play. Continue Copenhagen exercises 2× per week as maintenance. Return-to-play criteria (must meet all five): hip adduction strength within 10% of uninvolved side (measured by handheld dynamometry or reproducible squeeze test), pain-free single-leg squat, pain-free single-leg hop for distance, pain-free sport-specific cutting at match intensity, and no palpation tenderness at the adductor origin.
5 Products That Make the Protocol Runnable at Home
1. ProBody Pilates 9-Inch Ball Phase 1 Isometric Anchor

Best-use paragraph: The isometric adductor squeeze at 0° and 90° hip flexion is the single most-cited phase 1 exercise in the Aspetar protocol. This 9-inch anti-burst ball provides consistent, deformable resistance that a rolled towel cannot match — it forces the adductors to sustain contraction across a controlled range rather than clamping down and losing tension. The ProBody model uses clinic-grade PVC and includes a pump; users report multi-year durability under daily use.
Specs: 9-inch inflatable, latex-free anti-burst PVC, includes straw pump, supports up to 300 lb loading pressure.
- ✅ Correct diameter for supine and 90° hip flexion isometric squeezes
- ✅ Deformable resistance holds the target muscle length
- ✅ Doubles as a lumbar support tool for phase 2 core work
- ⚠️ Requires periodic re-inflation (roughly monthly with daily use)
2. TheraBand Resistance Loop Set: Phase 2 Concentric Loading

Evidence-first opener: The Aspetar protocol phase 2 defines progression not by weeks but by the load at which the athlete fatigues at 20 repetitions of standing hip adduction. Progression to phase 3 requires that the current resistance produce fatigue between 15 and 20 reps meaning graded resistance across at least four increments is required. This loop set delivers that graded progression at a fraction of the cost of an adductor-machine gym membership.
Specs: Five color-coded latex loops covering yellow (thinnest) through black (heaviest); 12-inch continuous loop; TheraBand’s clinical-grade latex is the industry standard for physical therapy prescription.
- ✅ Enables Aspetar-style pain-dependent load progression
- ✅ Works for standing, side-lying, and supine adduction variations
- ✅ Portable protocol continues on travel weeks
- ⚠️ Latex; check for allergy before purchase (non-latex versions exist)
3. URBNFit Gliding Discs: Phase 3 Slider Adductions

Best-use opener: Slider hip adductions are the bridging exercise between resistance-band loading and true eccentric Copenhagen work. Standing with one foot on the disc, the athlete slides the leg out laterally under bodyweight and controls the pull back to midline — a low-amplitude, high-frequency eccentric that adductor-strain protocols cited by Sports Health (2025 consensus) recommend for the 3–5 week window. Dual-sided design means they work on carpet and hardwood without additional accessories.
Specs: 7-inch diameter, dual-sided (foam and hard plastic), sold as a pair with an illustrated exercise guide.
- ✅ Provides controlled eccentric loading before Copenhagen introduction
- ✅ Trains adductor across a functionally relevant range
- ✅ Also works for lateral lunges, mountain climbers, plank slides
- ⚠️ Foam side wears faster than the plastic side under heavy weekly use
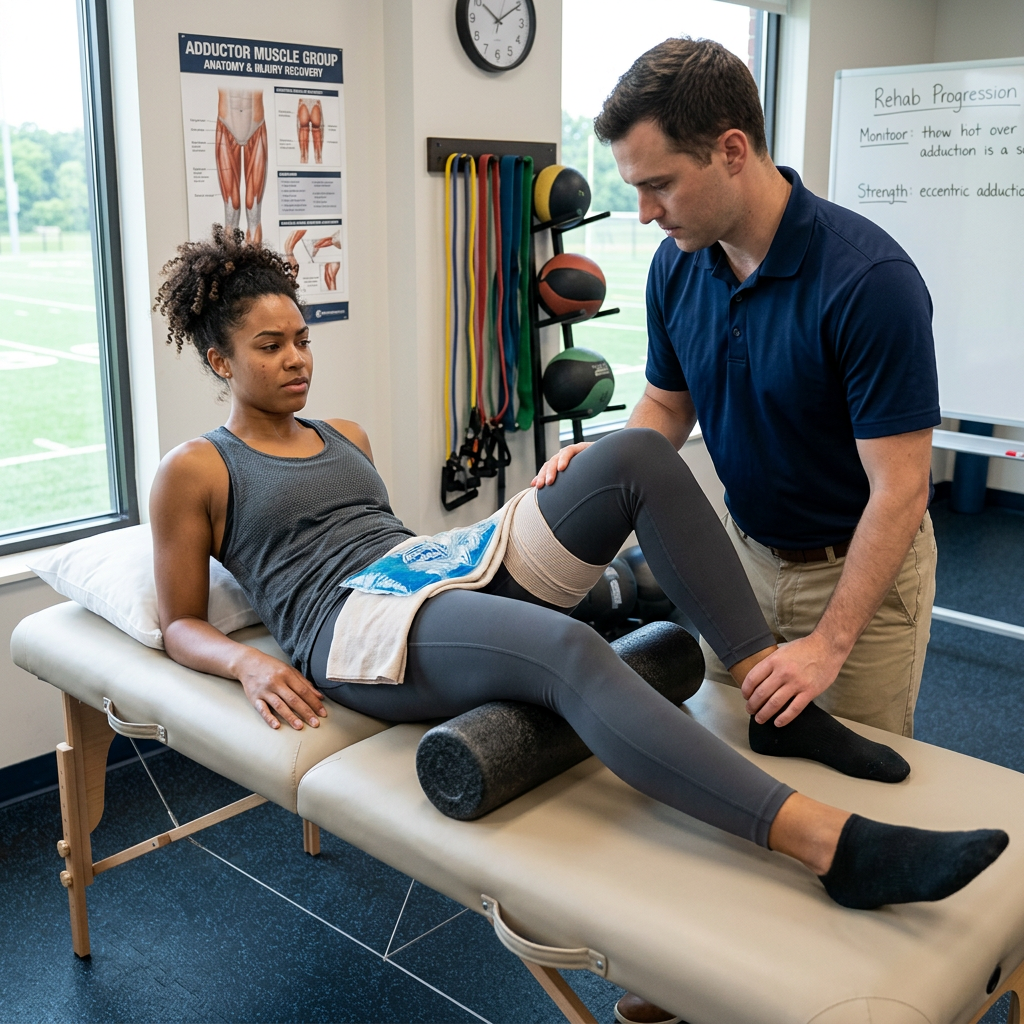
4. CAMBIVO Thigh Compression Sleeves with Gel Pack: Acute Phase Support

Documented limitation opener: Compression does not accelerate tissue healing. What it does is reduce the local edema and proprioceptive uncertainty of the first 72 hours after a Grade II strain, which allows earlier commencement of pain-free isometric loading the load-first-heal-second principle Aspetar’s protocol is built on. The CAMBIVO sleeve pairs graduated compression with a reusable hot/cold gel pocket for the phase-1 icing window.
Specs: Adjustable non-slip straps; two-panel construction with a gel pocket; sized S/M/L/XL by mid-thigh circumference.
- ✅ Adjustable strap system fits proximal thigh (higher than most sleeves)
- ✅ Reusable gel pack handles both cold (acute) and warm (loading days)
- ✅ Compression grade suitable for reducing acute edema
- ⚠️ Strap over adductor origin may be uncomfortable in the first 48 hours of a Grade II tear
5. TriggerPoint GRID Foam Roller Tissue Work Between Phases

Comparison opener: A foam roller is not a treatment for a groin strain — it is an adjunct for the surrounding musculature that overworks to compensate. The tensor fasciae latae, quadratus lumborum, and adjacent hip flexors reliably tighten in the weeks after an adductor injury, and unaddressed compensations are a documented driver of re-injury. The GRID’s hollow-core construction supports full bodyweight without deformation across years of daily use; user-reported longevity in long-term Amazon listings exceeds five years for the original model.
Specs: 13 × 5.5 inches, hollow ABS core, multi-density EVA surface, 500-lb load rating, 1-year manufacturer warranty.
- ✅ Firm enough for compensating hip flexor and TFL release
- ✅ Multi-density surface differentiates trigger-point pressure from broader tissue work
- ✅ Structural durability far exceeds cheaper closed-cell foam competitors
- ⚠️ Do not roll directly over the injured adductor belly during phases 1–2
Comparison Table
| Tool | Protocol Phase | Primary Function | Est. Price |
|---|---|---|---|
| ProBody 9-inch Ball | Phase 1 | Isometric adductor squeeze | $12–$18 |
| TheraBand Loop Set | Phase 2 | Graded concentric loading | $15–$25 |
| URBNFit Sliders | Phase 3 | Controlled eccentric slides | $10–$15 |
| CAMBIVO Thigh Sleeves | Phase 0–1 | Acute compression & thermal | $25–$35 |
| TriggerPoint GRID | All phases | Compensator release | $34–$45 |
Prices reflect typical Amazon range at publication; live prices may vary.
Buying Guide
Start with two tools, not five
The two non-negotiables for the first four weeks of any adductor rehabilitation are a small ball for phase 1 and a resistance loop set for phase 2. Phase 3 sliders and compression sleeves can be added as the phases arrive. For a Grade I strain that resolves within three weeks, the ball and band may be the only equipment required.
Skip the adductor machine
Commercial adductor machines seat the athlete with fixed hip flexion and load a single motion pattern. The Aspetar protocol, the 2025 consensus panel, and the Copenhagen adduction exercise systematic review all favor multi-position loading supine, side-lying, standing, and long-lever eccentric — which is precisely what a resistance loop and slider combination provides. Home equipment matches the evidence base better than a $2,000 machine.
Know when to stop the protocol and see a physician
Escalate to imaging or in-person physical therapy if any of the following appear: worsening pain during phase 1 isometric holds after three days, palpable defect in the muscle belly, groin pain radiating to the testicle with a visible lump (possible hernia), or a Grade III mechanism (audible pop with immediate loss of function). Home protocols are appropriate for Grade I and most Grade II strains; imaging-confirmed Grade IIIb or complete tears require professional oversight.
FAQ
How long does a Grade II adductor strain take to heal?
Four to eight weeks on a criterion-based protocol, per the Aspetar prospective cohort (Serner et al., 2020). Athletes who progress on pain alone commonly return in three weeks and re-injure within twelve. Elapsed time is not a validated return-to-play criterion in the 2025 consensus.
Can I still walk and do upper-body training during recovery?
Yes, provided walking is pain-free. Upper-body pushing and pulling work is encouraged from day one, as is seated bike work at low resistance if it does not provoke groin symptoms. What to avoid: kicking, cutting, sprinting, and any hip abduction stretch that reproduces pain at end range.
Is the Copenhagen adduction exercise safe if I have never done it before?
The short-lever variation (support at the knee) is well tolerated by most athletes and generates 40–60% less peak muscle activation than the long-lever variation. Start there. The 2026 Apunts Sports Medicine systematic review found consistent improvements with progressive volume; there were no serious adverse events reported across the ten included RCTs.
Do I need a partner to do the Copenhagen exercise at home?
No. A low bench, ottoman, or padded chair set at knee height works for the short-lever version. For the long-lever version, a training bench with a padded roll at ankle height is the closest home approximation. A partner allows more accurate load progression but is not required.
Should I use heat or ice on a groin strain?
Ice for the first 48–72 hours to manage swelling and pain, then transition to heat before rehabilitation sessions to raise tissue temperature and improve loading tolerance. This aligns with Cleveland Clinic guidance for grade II musculotendinous strains. Neither modality accelerates tissue healing; both facilitate the loading work that does.
Verdict
The Bottom Line
Groin strain recovery is a loading problem, not a rest problem. The Aspetar four-phase protocol, validated by the 2025 return-to-play consensus and reinforced by a decade of Copenhagen adduction exercise research, is directly runnable at home with a small ball for isometric work, a resistance loop set for concentric progression, gliding discs for controlled eccentric slides, a compression sleeve for the acute window, and a foam roller for compensator management. Progress by hitting the load targets in each phase, not by watching the calendar. Return to sprint and cutting only when adductor strength is within 10% of the uninvolved side.
#1 pick for the essential loading tool: the TheraBand Resistance Loop Set it is the phase-2 workhorse that most home rehabilitations skip.
The 5 Tools in This Guide
- ProBody Pilates 9-Inch Ball — phase 1 isometric anchor
- TheraBand Resistance Loop Set — phase 2 graded loading
- URBNFit Gliding Discs — phase 3 slider adductions
- CAMBIVO Thigh Compression Sleeves — acute-phase compression and thermal
- TriggerPoint GRID Foam Roller — compensator release across all phases
For related recovery protocols, see our Hamstring Strain Grade-by-Grade Return-to-Sprint Protocol, Meniscus Tears Conservative Recovery Protocol, and Complete 2026 Recovery Stack Guide.
Sources
- Serner, A., et al. “Return to Sport After Criteria-Based Rehabilitation of Acute Adductor Injuries in Male Athletes: A Prospective Cohort Study.” Orthopaedic Journal of Sports Medicine, 2020. https://pubmed.ncbi.nlm.nih.gov/32047831/
- López-Valenciano, A., et al. “Consensus of Return-to-Play Criteria After Adductor Longus Injury in Professional Soccer.” Sports Health, 2025. https://pubmed.ncbi.nlm.nih.gov/40423270/
- Alonso-Fernández, D., et al. “The influence of Copenhagen adduction exercise on the management of groin pain: A systematic review.” Apunts Sports Medicine, 2026. https://www.sciencedirect.com/science/article/pii/S2666506926000027
- Sabbir, M.M., et al. “The effectiveness of the Copenhagen adduction exercise on improving eccentric hip adduction strength among soccer players with groin injury: a randomized controlled trial.” 2024. https://pubmed.ncbi.nlm.nih.gov/38376593/
- Aspetar Sports Medicine Hospital. “Acute Adductor Injuries Treatment Protocol.” Aspetar Clinical Guidelines. https://www.aspetar.com/en/professionals/aspetar-clinical-guidelines/acute-adductor-injuries-treatment-protocol
- Cleveland Clinic. “Groin Strain: Symptoms, Causes & Treatment.” Reviewed 2024. https://my.clevelandclinic.org/health/diseases/groin-strain
- American Academy of Orthopaedic Surgeons. “Muscle Strains in the Thigh.” OrthoInfo. https://orthoinfo.aaos.org/en/diseases–conditions/muscle-strains-in-the-thigh
- “A Scoping Review of Exercises for Preventing Athletic Groin Pain.” PMC, 2025. https://www.ncbi.nlm.nih.gov/pmc/articles/PMC12824425/
Leave a Reply